How to Add a Video to a Framer Template (Full Guide)
They help communicate your message faster, improve user engagement, and increase conversion rates. If you’re using a Framer template, adding a video might seem a bit technical at first—but it’s actually quite straightforward once you understand the steps.
In this guide, you’ll learn how to embed videos into your Framer project using both YouTube/Vimeo and custom MP4 files. We’ll also explore styling options, mobile responsiveness, and strategic placement to get the most out of your video content.
In Short: How to Add a Video in Framer
Adding a video to your Framer site is simple once you know where to look. Below are two quick methods to insert and configure a video element—whether you’re working from the insert panel or directly within a layout block.
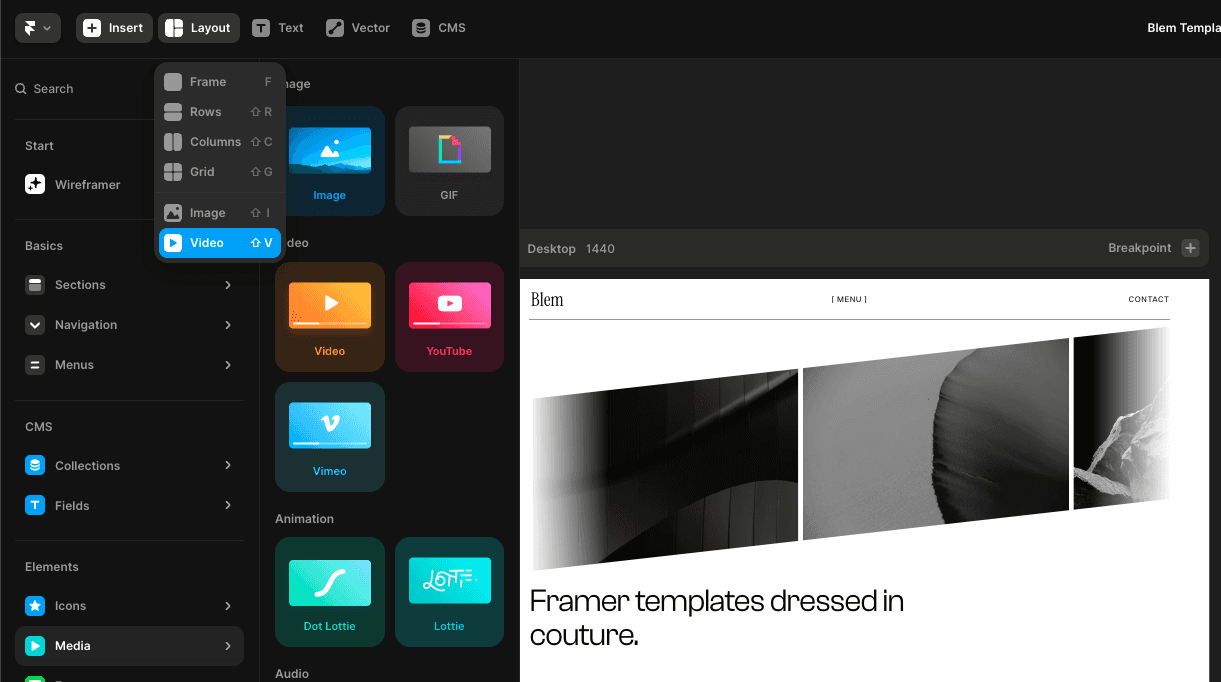
Method 1: Via Insert Panel
While in edit mode, click on “Insert” (top bar).
A side panel appears on the left.
Scroll to “Elements” → then go to “Media”.
Click on “Video” (just below “Image”).
The video component is now placed on your canvas.
In the right-hand settings panel, paste your MP4 video URL.
Configure options: autoplay, loop, muted, controls.
Resize and position the video as needed.
Method 2: Via Layout Menu
Click on any Layout block in your canvas.
A dropdown menu appears inside the block.
Scroll down and click on “Video” (usually at the bottom).
The video gets inserted inside that layout container.
Paste your video URL, and adjust playback settings.
Both methods allow you to insert and configure a video component quickly. Want autoplay? Mute it first. Need responsiveness? Use relative units and preview on mobile.
Understanding How Framer Handles Video
Framer is a visual website builder that allows you to add interactive and dynamic content without code. When it comes to video, Framer supports several formats and embedding methods. The two most common are external video platforms (like YouTube and Vimeo), and direct links to video files (such as MP4s hosted on your server or a CDN).
You can’t upload videos directly into Framer like you would with images. Instead, you either embed them from an external platform or link to where they’re hosted online. This gives you more flexibility and helps keep your site lightweight and fast.
Adding a YouTube or Vimeo Video
The easiest way to add a video to a Framer template is by embedding one from YouTube or Vimeo. These platforms handle video delivery, optimization, and device compatibility—so you don’t have to.
Start by copying the embed URL or iframe code from your YouTube or Vimeo video. In your Framer project, go to the section where you want to insert the video. Then click the “Insert” button in the top menu and search for “Embed”. Drag this element into your layout. Inside the Embed field, paste the iframe code or a YouTube URL.
If you paste a YouTube link (like https://www.youtube.com/embed/yourvideoid), Framer will automatically recognize and render the video in your layout. You can resize the embed element to fit your design, and Framer will adjust it across breakpoints if you use relative units like percentages or viewport width.
Make sure you check the box for “Allow Fullscreen” and remove unnecessary borders in the iframe code if you want a clean look.
Embedding a Self-Hosted MP4 File
If you want more control over your video—such as a custom-branded player or ad-free experience—you can host your own MP4 video and embed it using Framer’s Video component.
To do this, go to “Insert” and choose “Video” from the list. Drag it into the canvas where you want the video to appear. In the right-hand properties panel, you’ll see fields to paste your video URL. This must be a direct link to an MP4 file hosted on a platform like AWS S3, Cloudflare Stream, or Bunny.net.
You can enable or disable settings like autoplay, loop, muted, and controls. Autoplay works best with muted videos, especially if you’re placing the video in the hero section. However, keep in mind that mobile browsers often block autoplay unless the video is muted.
Using your own hosted MP4 gives you more creative freedom, but make sure the file is optimized. Large files can slow down your site and hurt performance scores.
Styling and Positioning Your Video
Once your video is embedded, it’s important to style it properly. Framer allows you to resize the video container using drag handles or by entering exact values in the style panel. Use responsive units like %, vw, or vh to ensure your video scales properly on all devices.
You can also layer content on top of your video. For example, you might add a heading or CTA button using a container with a higher Z-index. This is useful when you want to create a hero section with video background and a call-to-action right in the middle.
Just be sure your video doesn’t dominate the layout visually. A video should support your message—not distract from it. If it’s too large or visually heavy, it might overpower your headline or CTA.
Making It Mobile-Responsive
Mobile optimization is essential. In Framer, you can easily preview and adjust your design for different screen sizes using breakpoints. Select your video element and fine-tune its size and placement for smaller screens.
Avoid relying on autoplay with sound for mobile users, since most mobile browsers block this behavior by default. If your message relies on narration, add captions or a visible “Play” button to encourage user interaction.
You can also hide videos on mobile and replace them with a static image or GIF if performance is a concern. This ensures your page loads fast and maintains a smooth user experience.
Strategic Placement: Where Should Your Video Go?
According to principles of conversion optimization and the Landingspage Formula, video placement matters just as much as content. Ideally, your video should appear high on the page—often in or just below the hero section. This helps reinforce your unique value proposition visually.
For product demos, place the video just before or after key feature highlights. For testimonials, place short video clips near trust indicators like logos, reviews, or case studies.
Don’t forget to include a clear call-to-action near the video. If people are watching and getting engaged, give them a next step—like clicking a button, filling out a form, or starting a free trial.
Final Tips Before You Publish
Before going live, preview your site on desktop, tablet, and mobile. Make sure the video plays as expected, loads quickly, and doesn’t block important content. Test on different browsers to catch any rendering issues.
If your video is above the fold, consider adding structured data (schema.org VideoObject) for better SEO visibility. Also, use descriptive filenames and alt text so search engines understand what your video is about.
Wrap-Up
Adding a video to your Framer template is a high-impact move. Whether you’re showing off your product, telling a story, or creating a mood—video can help you stand out. But it only works if done thoughtfully.
Use the right format, host it properly, style it responsively, and place it where it supports your message. Then let the video do its job: capturing attention and moving visitors toward action.